


")


Assembly
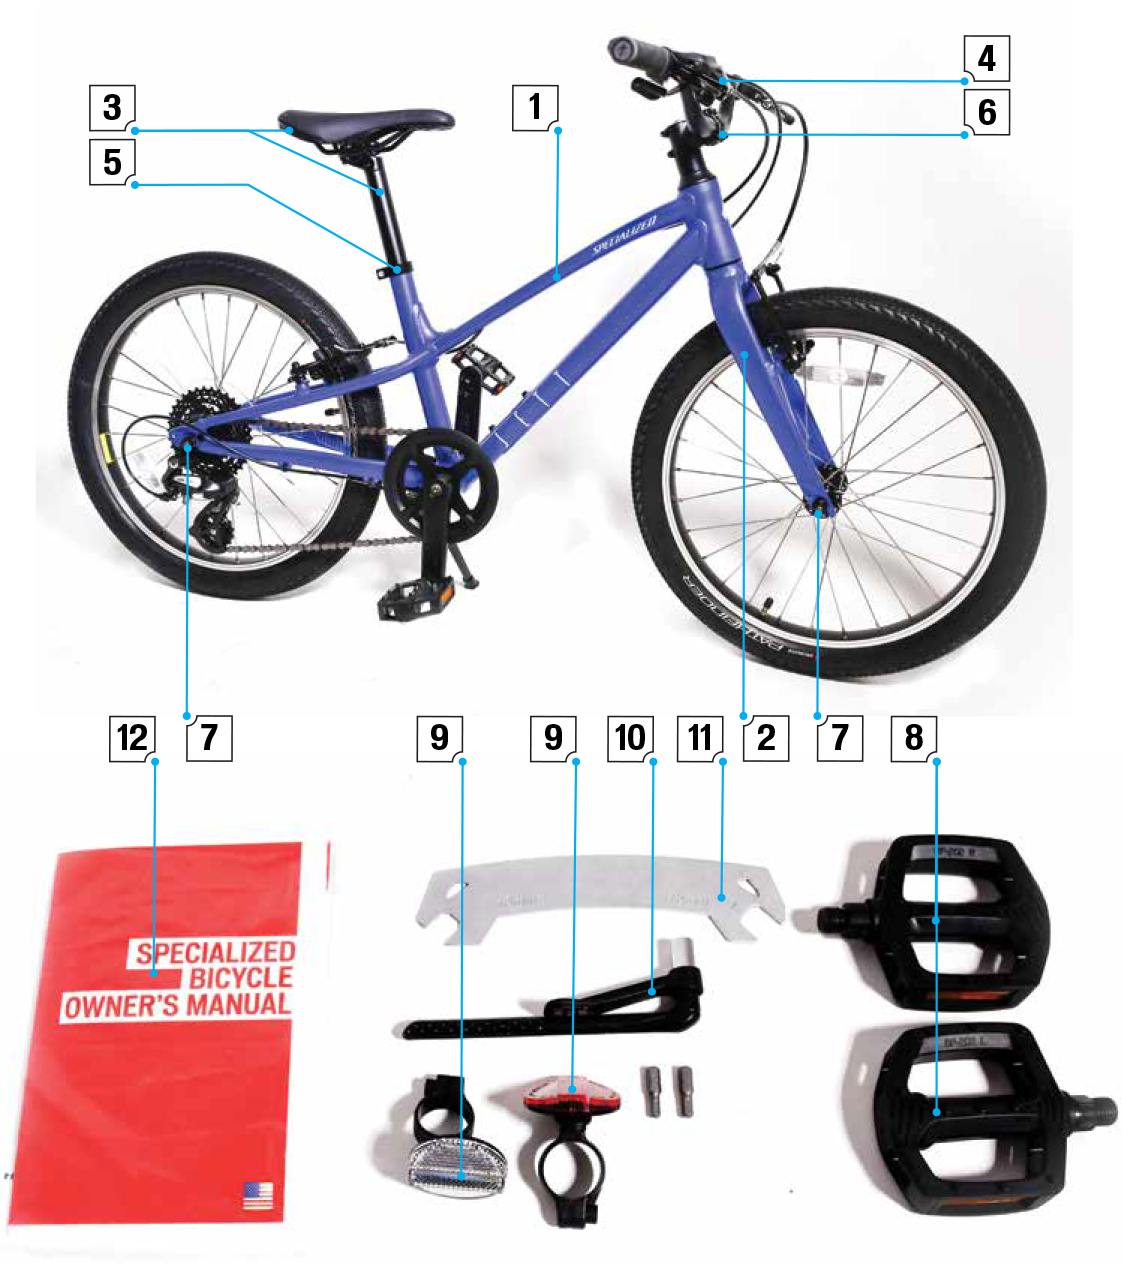
What's in the box
| # | DESCRIPTION | TORQUE | ||
|---|---|---|---|---|
| TOOL SIZE | in-lbf | Nm | ||
| 1 | FRAME | |||
| 2 | FORK | |||
| 3 | SEATPOST/SADDLE | |||
| 4 | HANDLEBAR | |||
| 5 | SEAT COLLAR | 5mm Hex | 44 - 53 | 6 - 7 |
| 6 | STEM | 4 mm Hex | 45 | 5.1 |
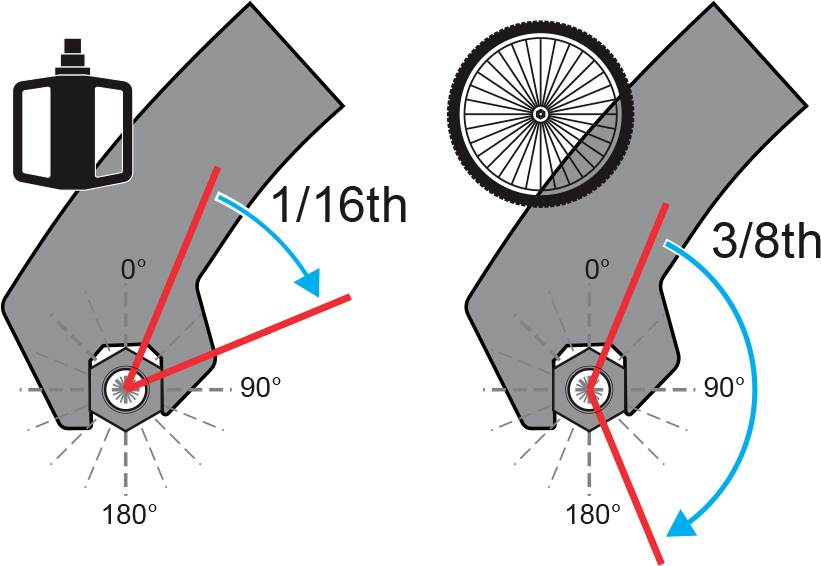
| 7 | *FRONT/REAR WHEEL | 15 mm Wrench | 3/8 turn* | |
| 8 | *PEDALS | 15 mm Wrench | 1/16 turn* | |
| 9 | REFLECTORS | Phillips Screwdriver | ||
| 10 | TORQUE WRENCH with 4-6 mm hex bits | |||
| 11 | WHEEL SPANNER 15mm wrench | |||
| 12 | MANUALS | |||
*See the green box under "How to use the Torque Wrench" below for an explanation of properly tightening the wheels and pedals.
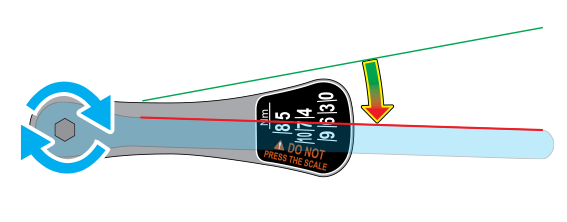
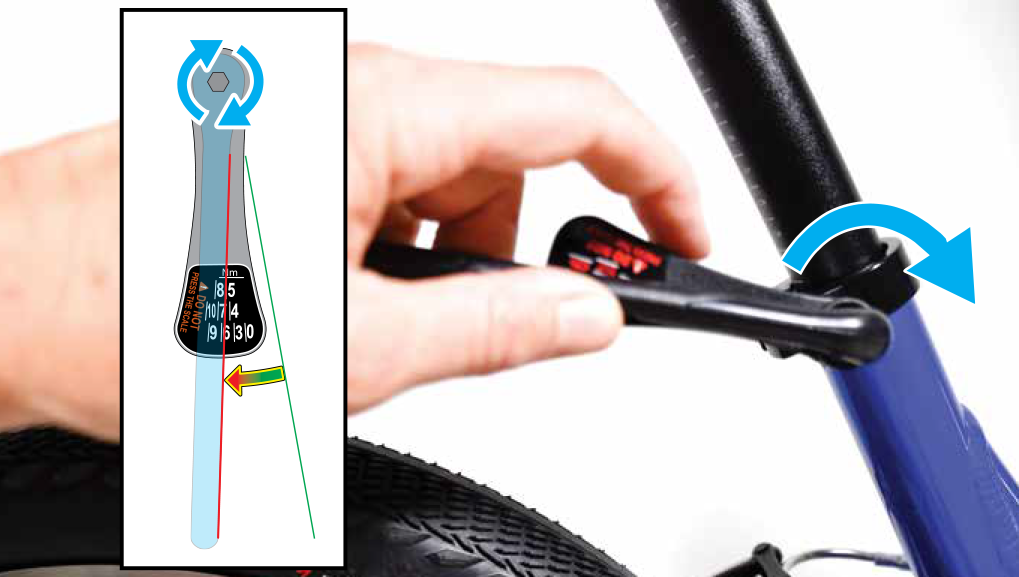
How to use the Torque Wrench
To use the torque wrench:
- Insert the 4 mm or 5 mm bit
- Check the applicable torque setting for the bolt
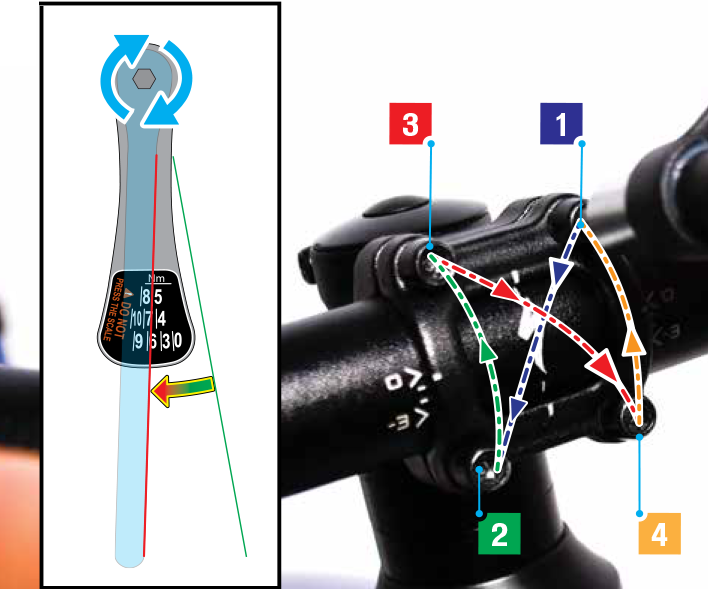
- As you tighten the bolt, watch where the right-side edge of the handle lines up with the torque settings on the wrench. Turn the lever arm clockwise until the right-side edge of the handle is aligned with the white line to the left of the desired torque amount (see image below)
*The supplied torque wrench contains 4mm and 5mm bits. To properly tighten the front/rear wheels and pedals without a torque wrench, start with the bolt loosened so there is just the beginning of tension. Turn the bolt clockwise either 3/8 turn (for wheels) or 1/16 turn (for pedals) as below in the image below.
Watch the video
www.specialized.com/setupmyjett
Click the link above or scan the QR code below to see a video on how to properly assemble the Jett and perform a safety check.

Unpack the box
- Open the box and remove the small parts box from the rear packaging tower (see image below)
- Open the small parts box and remove the manuals, pedals, reflectors, and tools inside
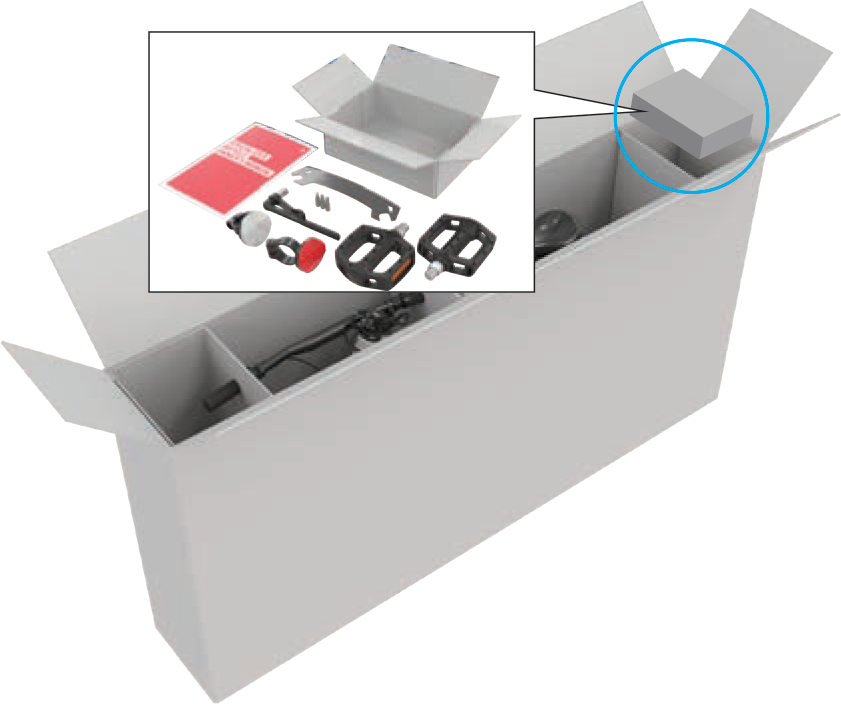
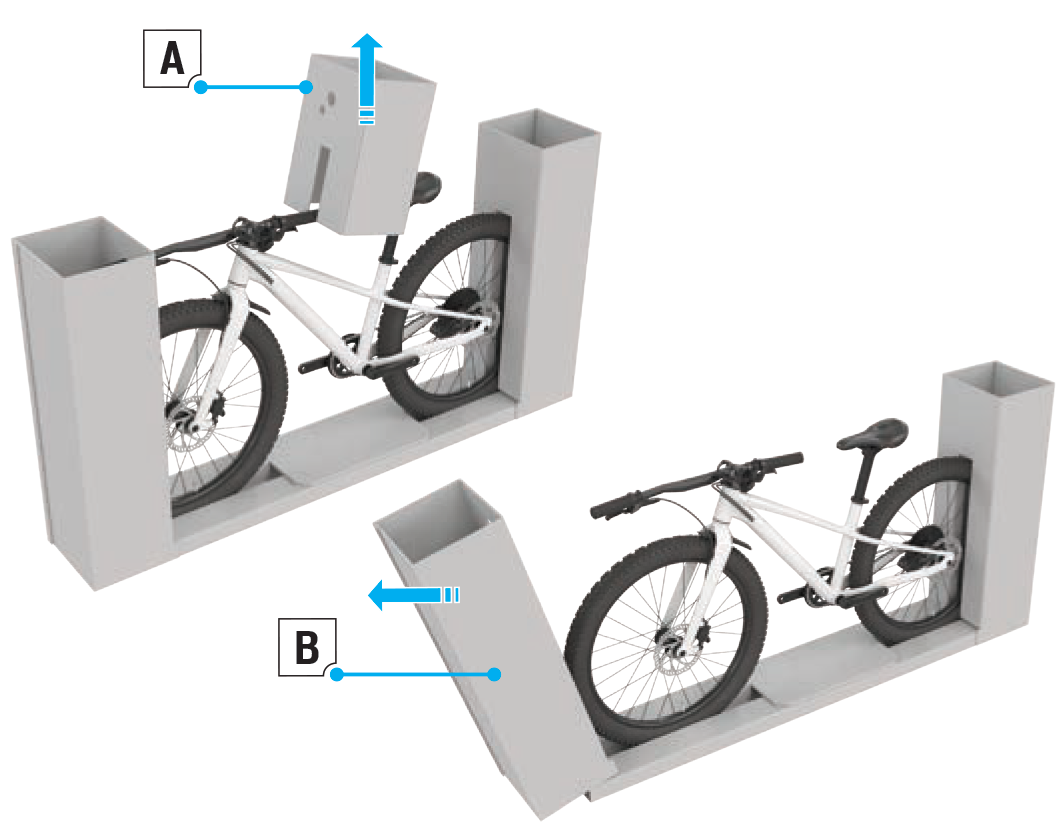
- Remove the bicycle from the box with the internal packaging attached. You will use the packaging as a stand for assembly.
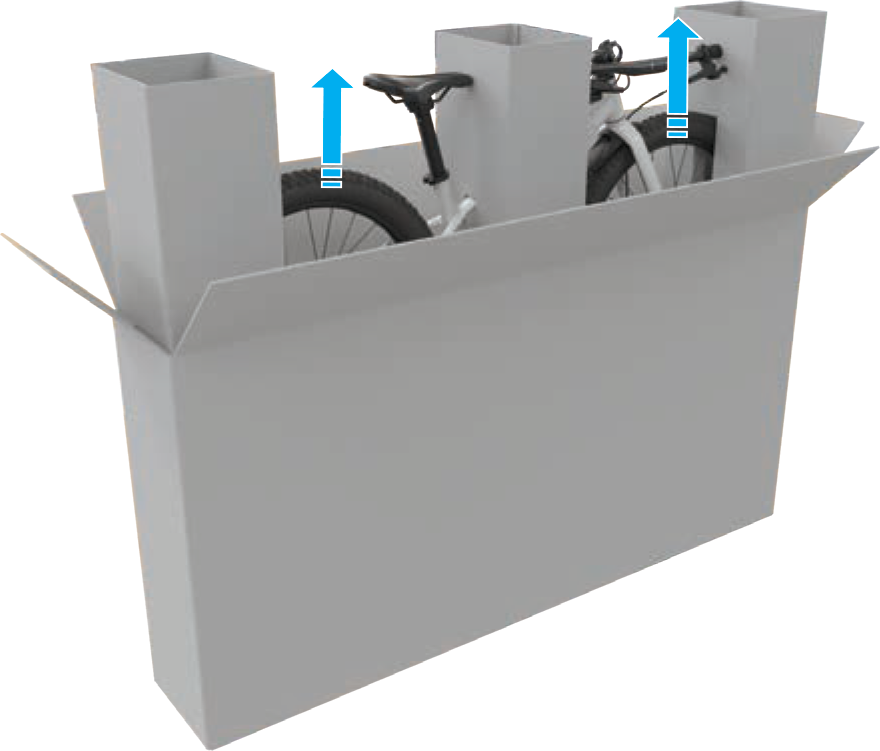
- Remove the center packaging (A in image below) that protects the handlebar and top tube, then remove the front tower packaging (B) from the handlebar.
Install the handlebar
The stem comes pre-installed on the bike. The handlebar assembly must be installed on the stem.
- Loosen the faceplate bolts (1 below), then remove the bolts and the faceplate (2) from the stem.
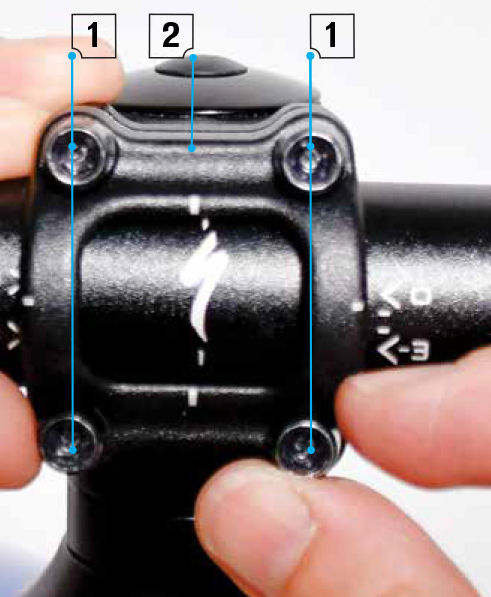
- Place the handlebar against the stem and replace the faceplate. Thread each bolt through the faceplate and into the stem body until they are equally finger-tightened, and the upper and lower gaps between the stem body and faceplate are equal, as shown with the blue arrows below.
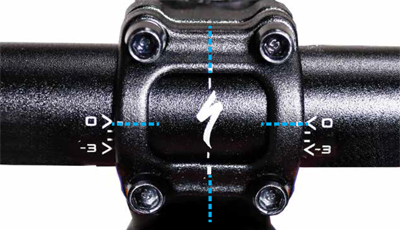
- Make sure the handlebar is centered with the stem by vertically and horizontally centering the handlebar logo in the stem faceplate as shown below.
- Use the supplied torque wrench and 4mm Allen bit to tighten each faceplate bolt approximately 1/2 turn in an alternating (cross) pattern as shown below, then repeat the cross pattern to torque to 45 in-lbf / 5.1 Nm.
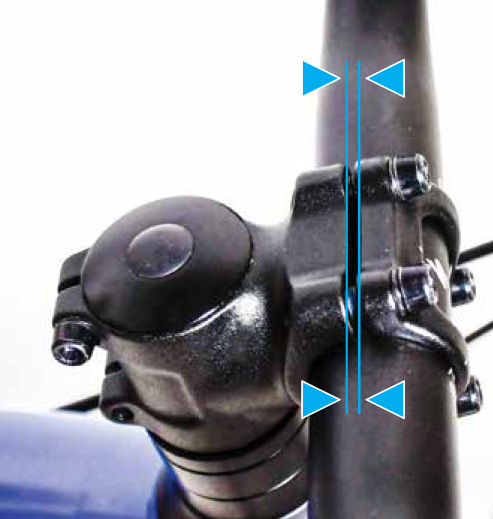
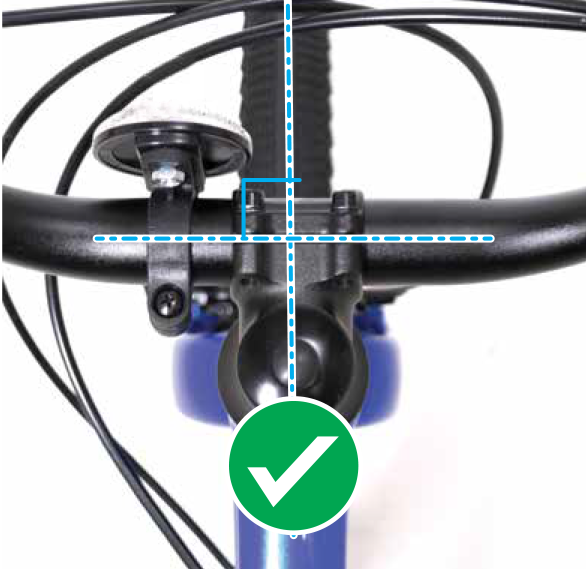
- Once assembly is complete, double check that the stem is aligned with the centerline of the bike as shown below.
Install the seatpost and adjust the saddle height
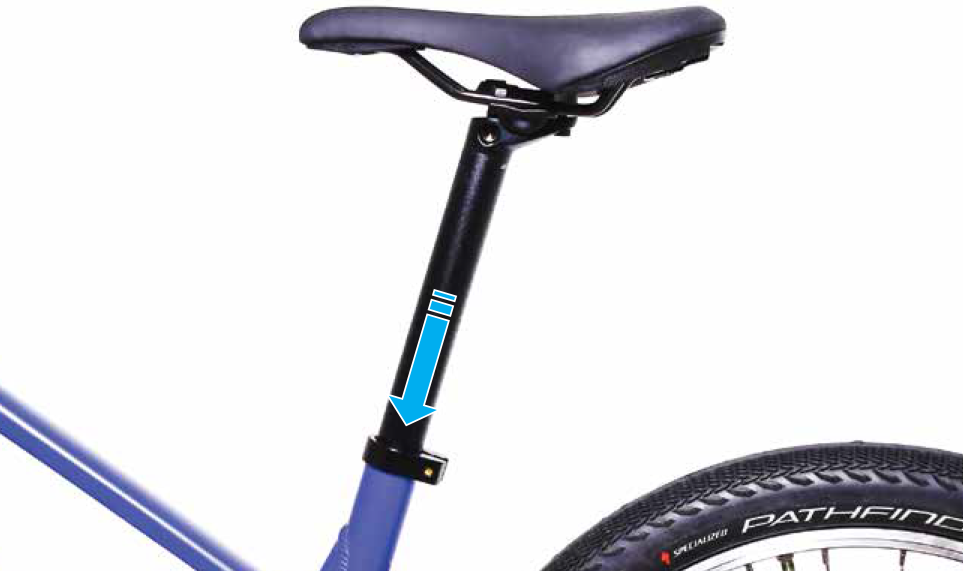
- Remove the seatpost/saddle from the packaging and insert the seatpost into the seat tube of the bike. Set the saddle height a little lower than your child's hip, then tighten the seat collar bolt.
- Check the saddle height by having your child sit on the saddle. Ideally, your child should be able to place the ball of each foot on the ground without too much knee bend.
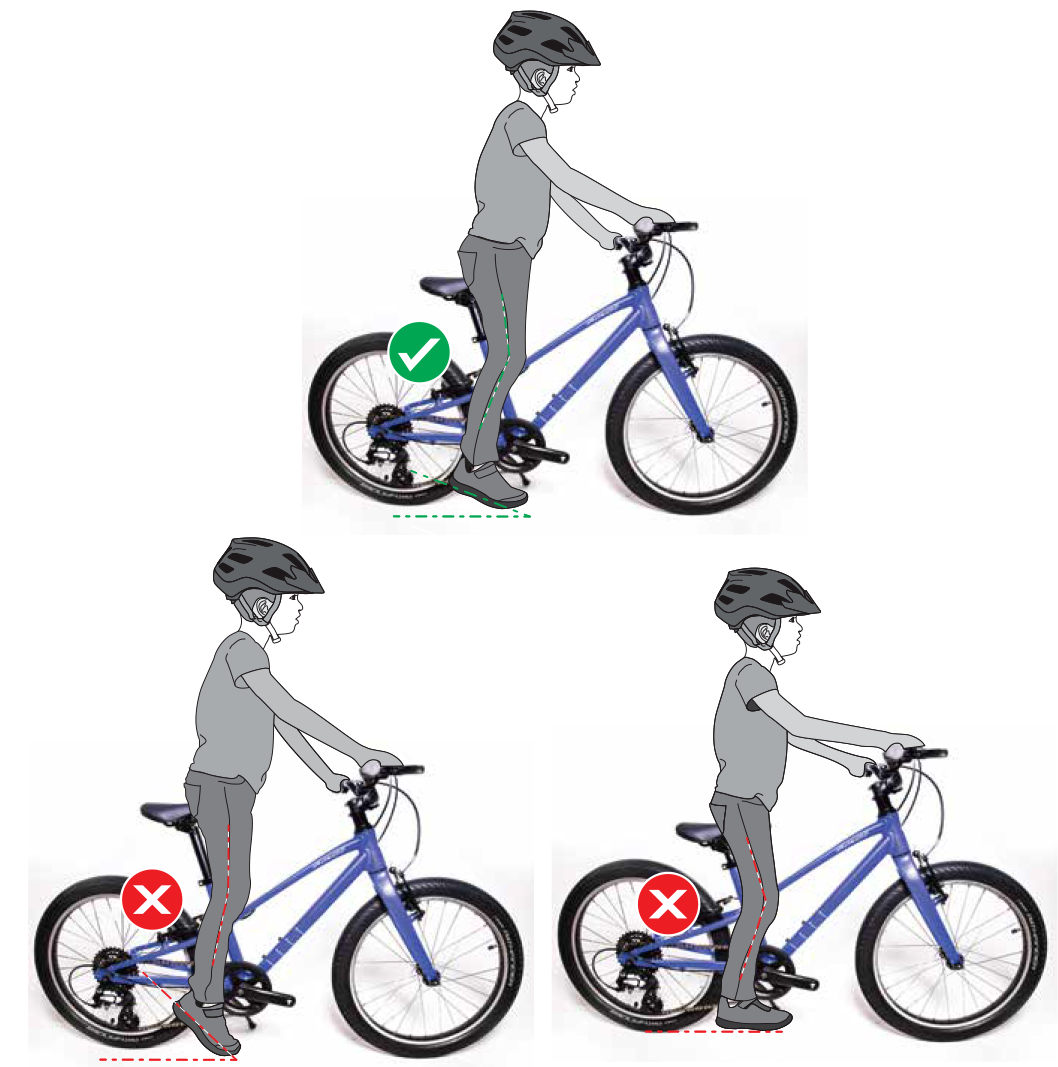
- You can raise or lower the saddle by loosening the seat collar bolt. Make sure that the "minimum insertion" line on the seatpost is not visible.
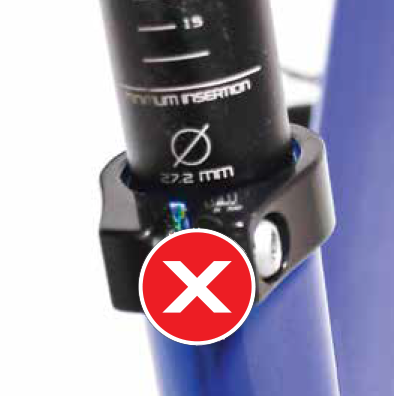
- Once you have the saddle at the correct height, align the saddle with the centerline of the bike and tighten the seat collar bolt with the Torque Wrench and 5 mm bit to 6-7 Nm.
Install the pedals
- Remove the pedals from their packaging and locate the "L" on the left pedal and the "R" on the right pedal (see image below).
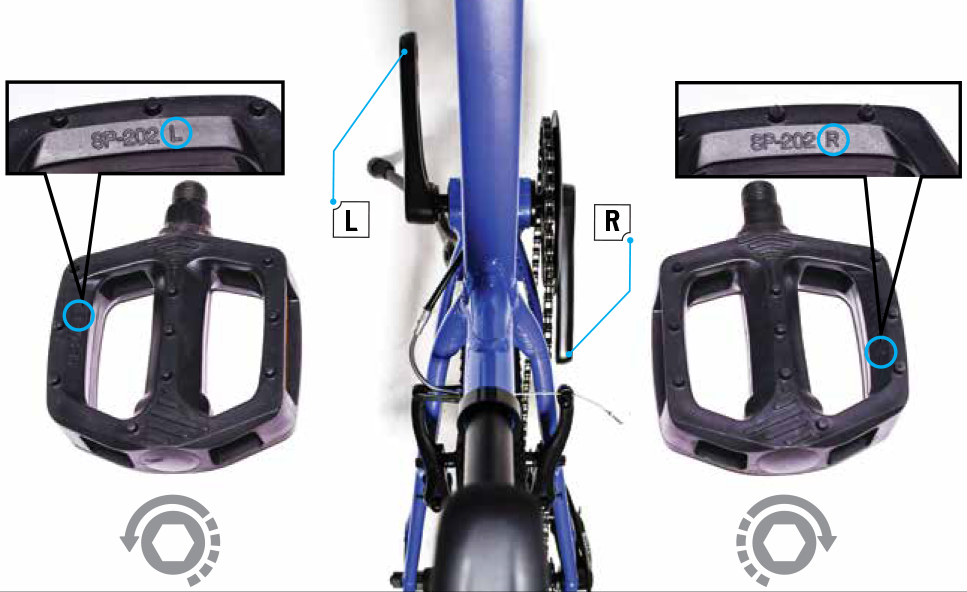
- Note that the left pedal has a left hand thread. When installing pedals, tighten toward the front of the bike as shown below. The left pedal will tighten counter-clockwise.

- Using the 15 mm wheel spanner wrench, tighten the pedals 1/16 turn as explained in the green box under "How to use the Torque Wrench" above.
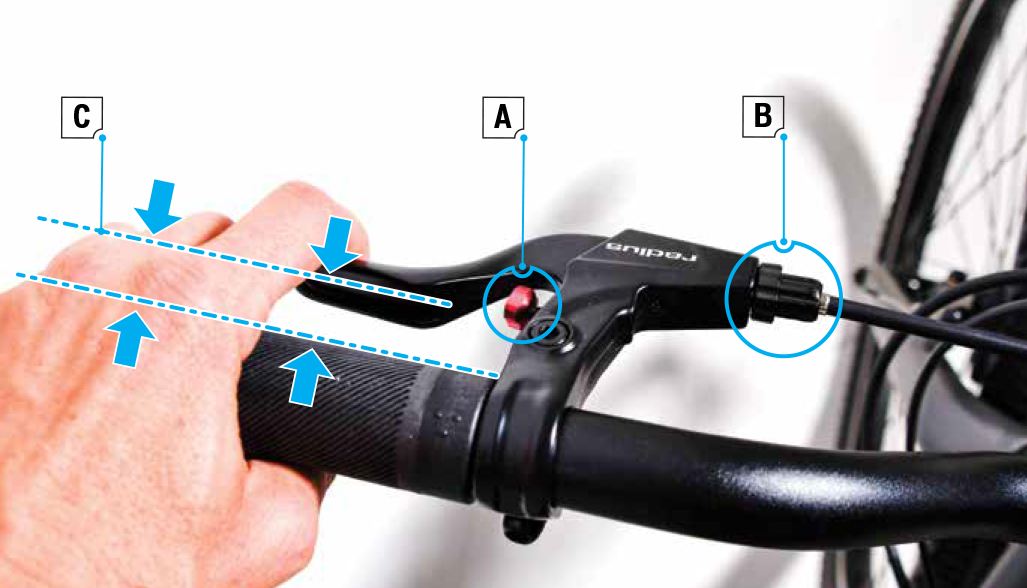
Adjust the brake levers
- The hand brakes are pre-adjusted at the factory. You can bring the lever closer to the bar (for smaller hands), by turning the red thumbwheels at the front of the brake lever (A in image below).
- Check if the wheels spin freely without the brakes rubbing, and that the lever does not touch the grip when the brake is applied (C).
- To tighten or loosen the brakes, you can turn the black thumbwheel (B). Unscrewing the thumbwheel will tighten the brake.
- If you need additional adjustments to the brakes, please see your Authorized Specialized Retailer.
Install the reflectors
Using a Philips screwdriver, install the front (white) reflector on the handlebar and the rear (red) reflector on the seatpost.