


")


Charging
- Regularly inspect the battery and charger for damage. Never charge a battery which you suspect is damaged or know is broken, and do not use it.
- Make sure the charging socket and plug are clean and dry before connecting and charging the battery.
- Only use the supplied charger cord. Ensure the cord plug is fully inserted in the charger before plugging the charger into a power outlet.
- Only use the Specialized charger supplied with the bicycle or other chargers approved by Specialized. Inspect the charger before every use for possible damage to the charger itself, the cable or the charging plug. Never use a charger which you suspect is damaged or know is broken.
- Place the charger on a stable, level surface unaffected by heat. If the battery is charged outside of the frame, place the battery on the same surface as the charger.
- You should charge the battery in a dry, well ventilated area and make sure the battery and charger are uncovered during the charging process. Ensure that the battery and charger are not exposed to any flammable or dangerous substances.
Charging instructions
- Plug the charger plug into an outlet (100 - 240V), using the appropriate plug for the country’s standards.
- Power off the bicycle on the TCU or MasterMind TCU.
Locate and open the charge port cover on the non-drive side of the battery near the motor housing.
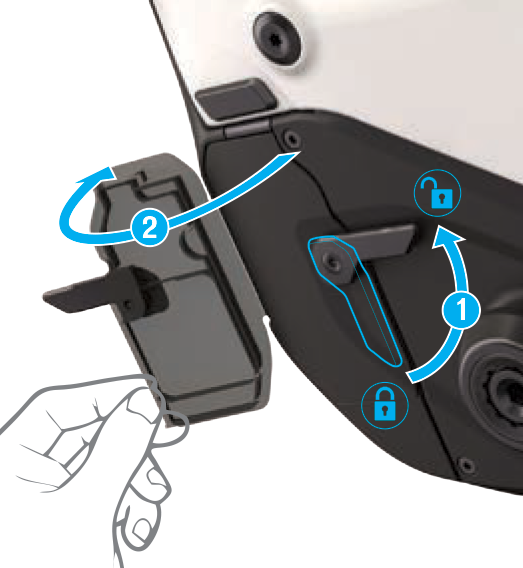
Rotate the lever on the plug 90 degrees and remove the plug from the battery.


Note: Handle of battery connector can unclip under certain usage patterns. The handle is designed to disconnect when pulling down towards ground or reaching a degree greater than 90° relative to the connector housing.

- This unclipping is intended per design to reduce/avoid stress on the cable if a rider pulls on handle toward ground.
- It is advisable to only pull up towards seat or perpendicular to the connector. This way the handle does not unclip.
- Handle can be replaced; see a retailer for assistance with ordering (S216800045).
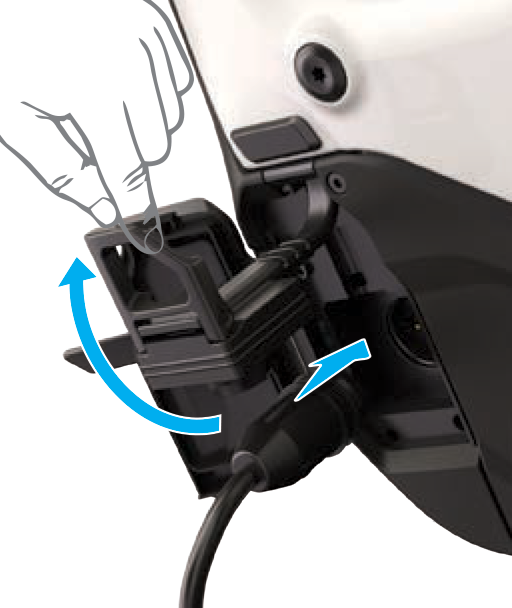
- Move the main hardness out of the way and insert the charging plug into the charge port.
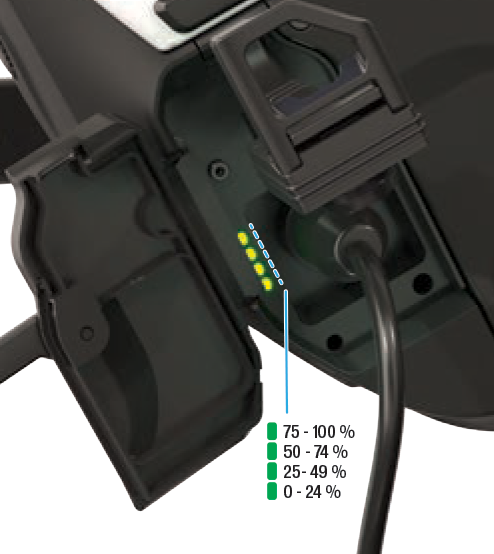
- The four green LEDs next to the charging socket indicate the level of charge in the battery in 25% increments.
- When charging is complete, disconnect the charging plug from the charge port.
- Re-insert the main harness plug into the port and rotate the lever back to the closed position.
- Close the charge port lid to seal it against water and debris.
- Unplug the charger from the wall socket.